Crafting In Metal Have Fun Learning
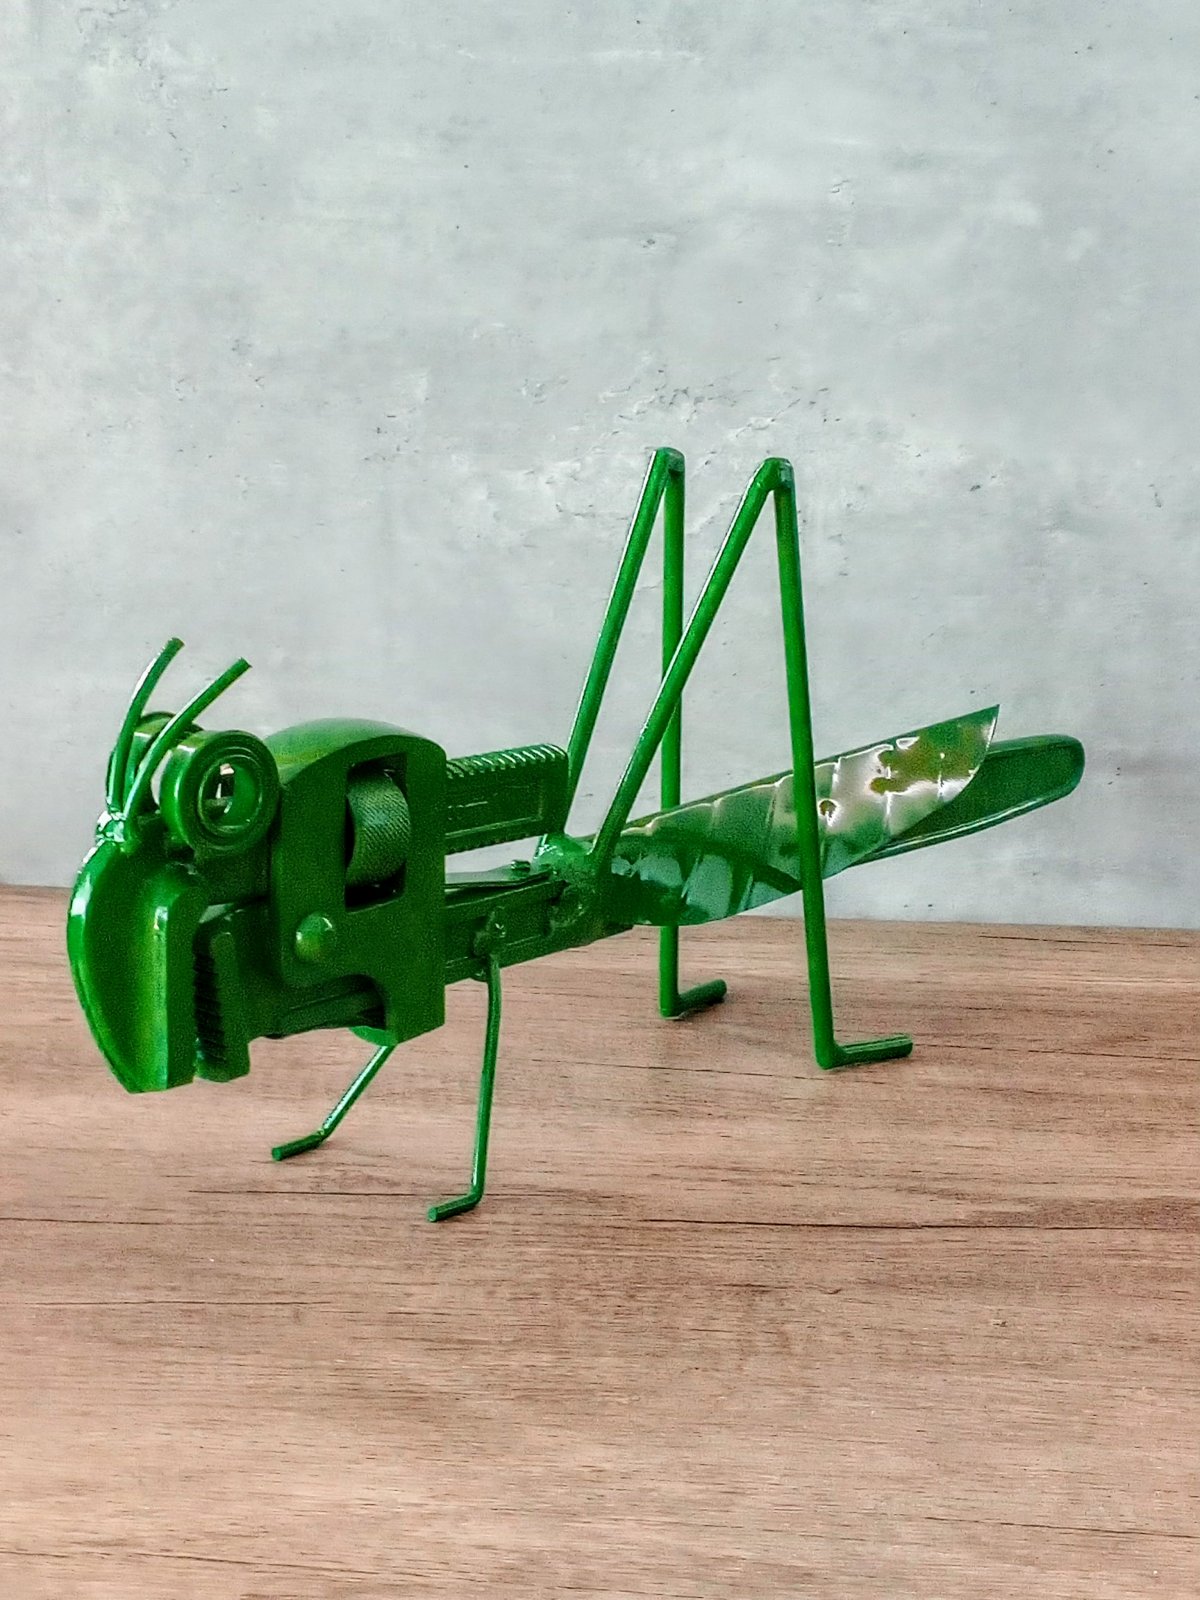
"Celebrate craftsmanship with The Metal Cricket—a unique, handcrafted sculpture that brings a touch of whimsy and charm to your décor."
The Metal Cricket Construction
Stellions (Spanner):
One stellion spanner (for the body)
Bars:
8mm bar (for legs)
6mm bar (for legs)
Bearings:
Two bearings (for eyes)
Sheet Metal:
1mm sheet metal (for wings)
Tools: Hacksaw or metal cutter. Drill and drill bits. Metal file. Pliers. Soldering kit or welding machine. Sandpaper
Protective gloves and goggles
Instructions:
Preparing the Spanner Body:
Select the stellion spanner to serve as the main body of the cricket.
Depending on the size and shape of the spanner, decide on the orientation that best resembles the body of a cricket. The handle of the spanner will likely form the main body, while the head can act as the base for the eyes and wings.
Constructing the Legs:
Cut the 8mm bar into two pieces, each approximately 10 cm in length, for the hind legs.
Cut the 6mm bar into four pieces, each approximately 8 cm in length, for the front and middle legs.
Use a metal file to smooth the edges of all cut pieces to prevent any sharp edges.
Attaching the Legs:
Drill small holes on the sides of the spanner where the legs will be attached. Ensure the holes are slightly larger than the diameter of the legs to allow for easy insertion.
Insert the legs into the drilled holes. Use pliers to bend the ends of the legs slightly to secure them in place.
Use a soldering kit or welding machine to firmly attach the legs to the spanner body. Ensure the legs are symmetrically positioned for balance and aesthetics.
Creating the Eyes:
Take the two bearings and position them on the head of the spanner to resemble eyes.
Use a small amount of adhesive or solder to attach the bearings to the spanner. Make sure they are aligned and evenly spaced.
Forming the Wings:
Cut one pieces of 1mm sheet metal into wing shapes, cut out a leave shape and bead to shape You can make the wings slightly curved for a more realistic appearance.
Smooth the edges of the wings with sandpaper to avoid any sharpness.
Attach the wings to the top of the spanner body using solder or adhesive. Position them symmetrically and angle them slightly upward for a lifelike effect.
Final Touches:
Sand down any rough spots and clean the entire model with a cloth to remove any debris.
Optionally, paint the cricket model with metallic or natural colors for a finished look.
Conclusion:
By following these steps, you can create a detailed and realistic cricket model using a stellion spanner, bars, bearings, and sheet metal. This model not only serves as a fun and educational project but also as a decorative piece showcasing your craftsmanship and creativity.

